heidi jump!
hi!
thanks for signing up for campfire! i'm rishabh, and i'll be teaching you how to make your first game: heidi jump!
the racoon's name is heidi. she's super cool.
heidi jump!
hi!
thanks for signing up for campfire! i'm rishabh, and i'll be teaching you how to make your first game: heidi jump!
the racoon's name is heidi. she's super cool.
gamemaker
first, make sure to install gamemaker and create a blank project: https://gamemaker.io/en/download
also, download my assets here: link
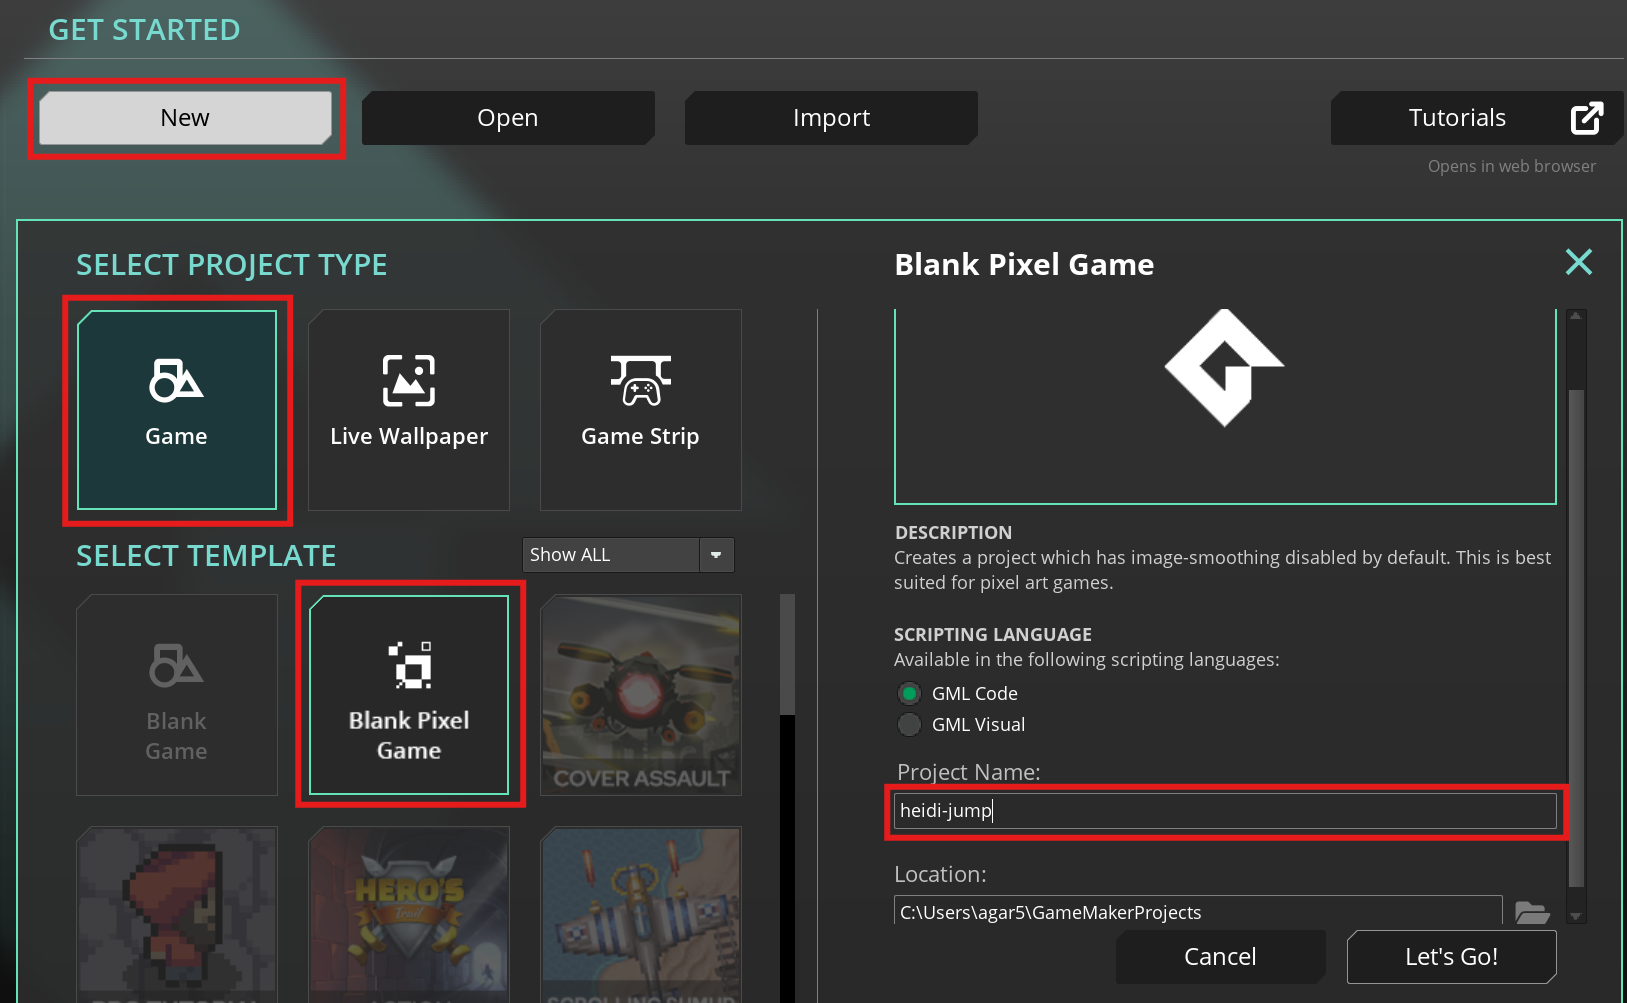
next, open gamemaker (may take a little bit on the first time) and click New > Game > Blank Pixel Game and change the Project Name to something cool, (make sure it doesn't have any spaces in it! it'll matter later)
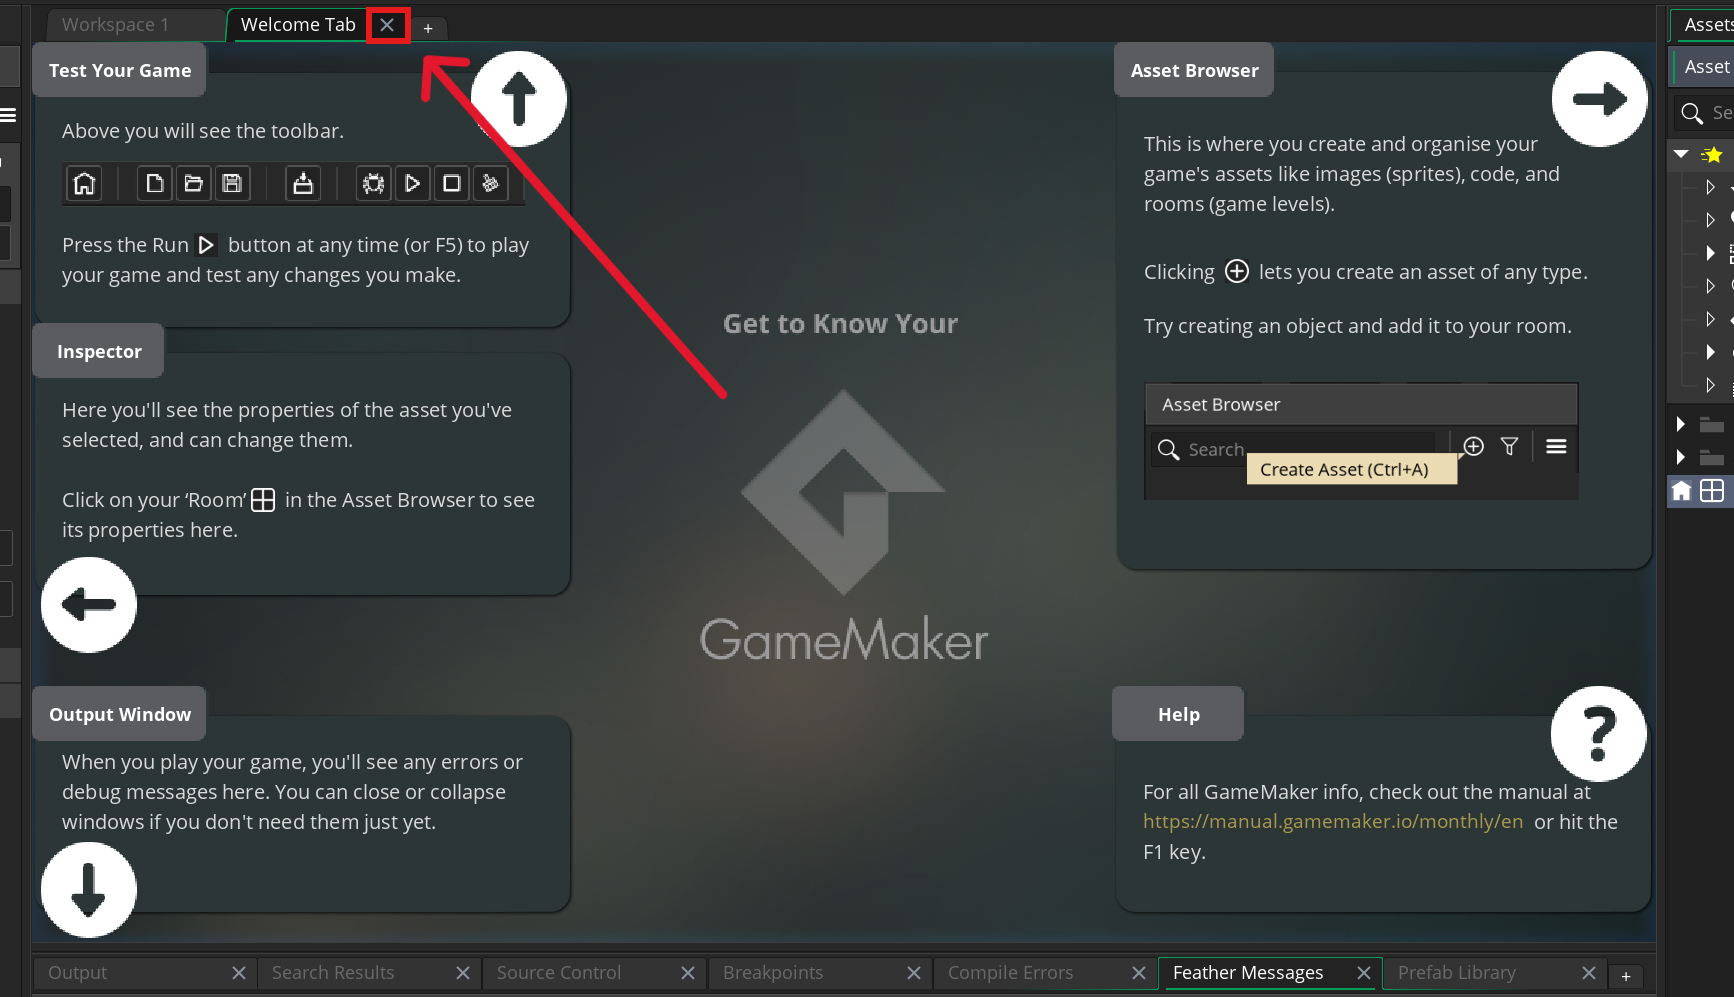
then it should open up your game editor! its a lot to take in, but i'll walk you through it. first close out of the welcome tab and lets get started!
sprites
sprites are the images of your game. they represent your enemies, backgrounds, and your heidi.
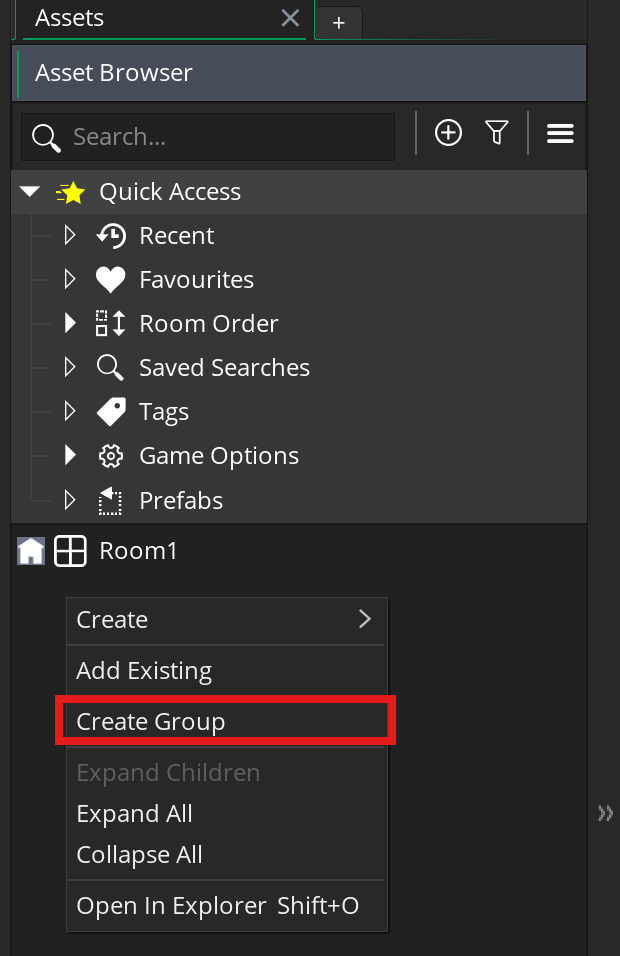
to make a sprite, right click on the blank space in the Asset Browser and click create group and call it Sprite. then, right click on that folder and click Create -> Sprite and call it sPlayer.
(you can call it whatever you want, but i promise this naming scheme makes things super easy)
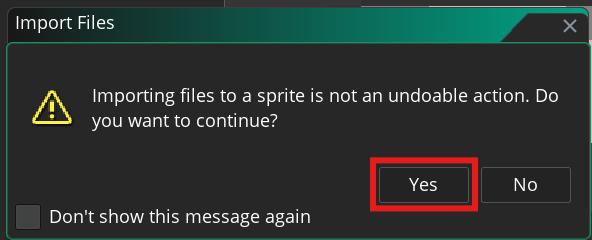
now, you can import your sprite! normally you should make your own sprite but i made one for you this time. you can just hit Import and select the player sprite from my asset pack from the last slide. make sure to click yes in the popup!
notice that each of these sprites are 16x16 pixels. generally, pixel art is done on a grid, where each sprite is either 16x16 pixels or 32x32 pixels. this makes everything look neat and super easy to work with.
hit ctrl + s (windows) or cmd + s (mac) to save your project!. do this often!!!!
objects
lets make some objects now!
since sprites are the images of your game, they can’t really do much by themself, but you can attach them to objects to make some really cool things.
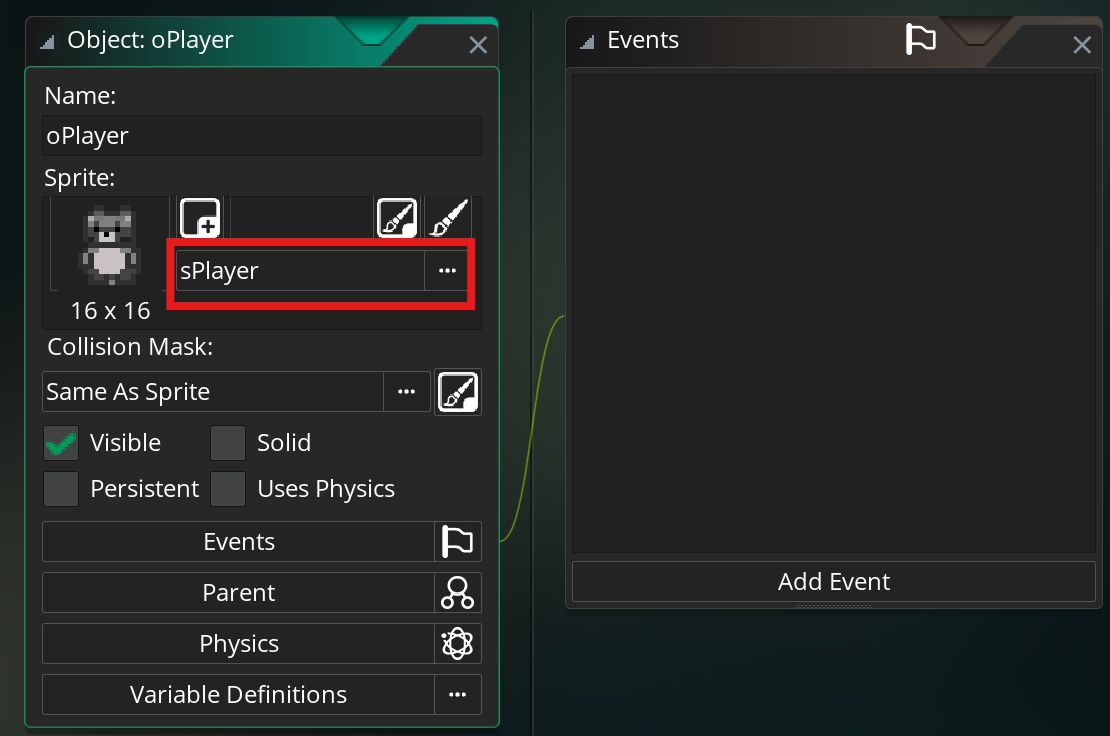
create a new folder for Objects, and right click on the folder and select Create -> Object. call it oPlayer and assign the sPlayer sprite to it.
here, you can create Events to add code your objects, but we can deal with that later.
finally, go back and do it all again for the platform, spikes, and flag, creating sprites and objects for each one. make sure to import the sprites and attach them to objects!
see the pictures on the right for how it should look when completed
(double click on an object/sprite in the asset browser to open it)
make sure to keep saving regularly! ctrl + s (windows) or cmd + s (mac)
rooms
now that we’ve created so many objects, it’s time to add them to your level!
Double click Room1 to open it.
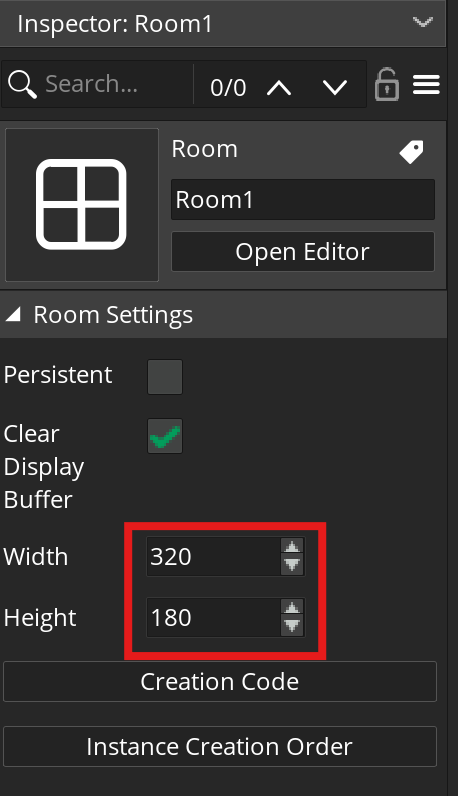
the default room size is pretty big, so lets change it 320 x 180 in the Inspector on the left.
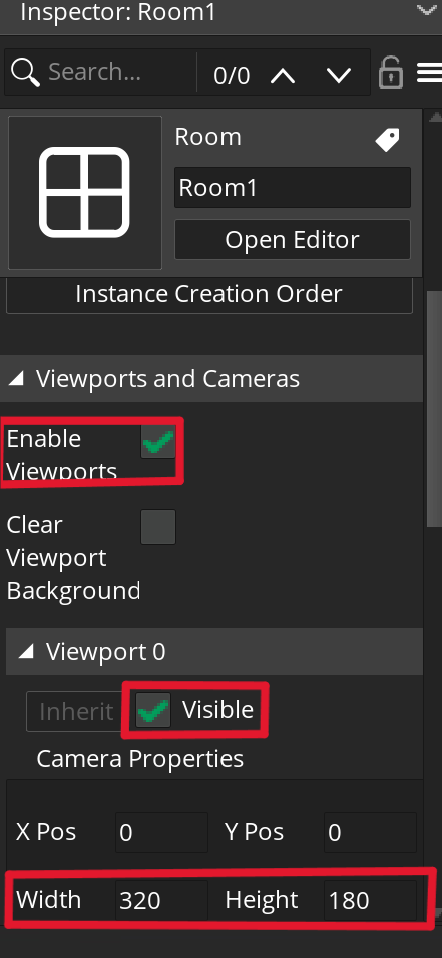
to make sure your game scales correctly, in the Inspector on the left, scroll down and open Viewports and Cameras. then, enable viewports, make Viewport 0 visible, and change the Camera Properties of Viewport 0 to 320x180
(not the Viewport Properties!)
you should also change the grid size in the top right corner of the room editorto 16x16 so the objects snap to the grid. (check the image on the right)
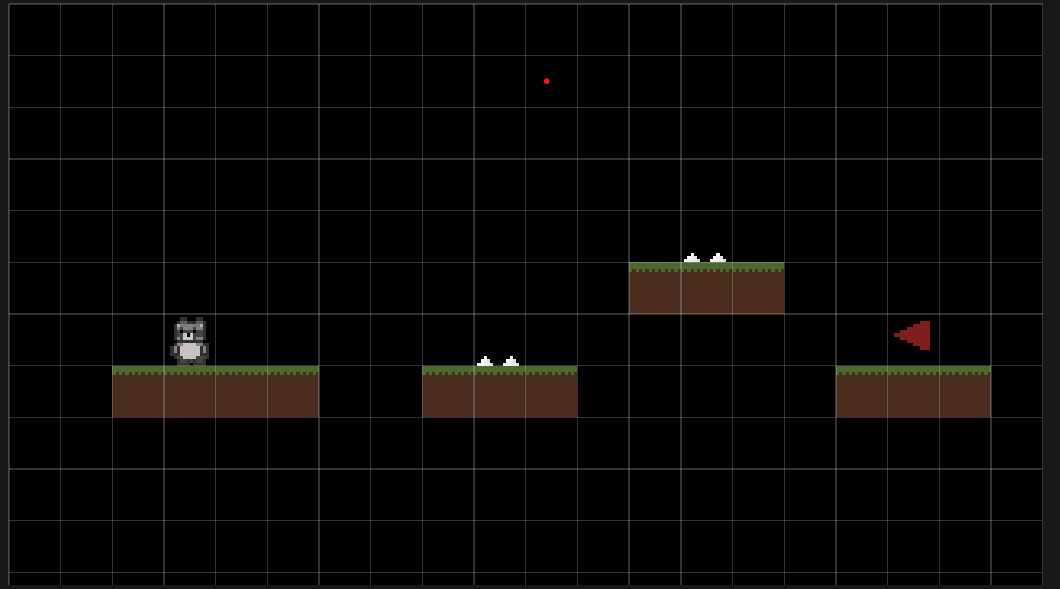
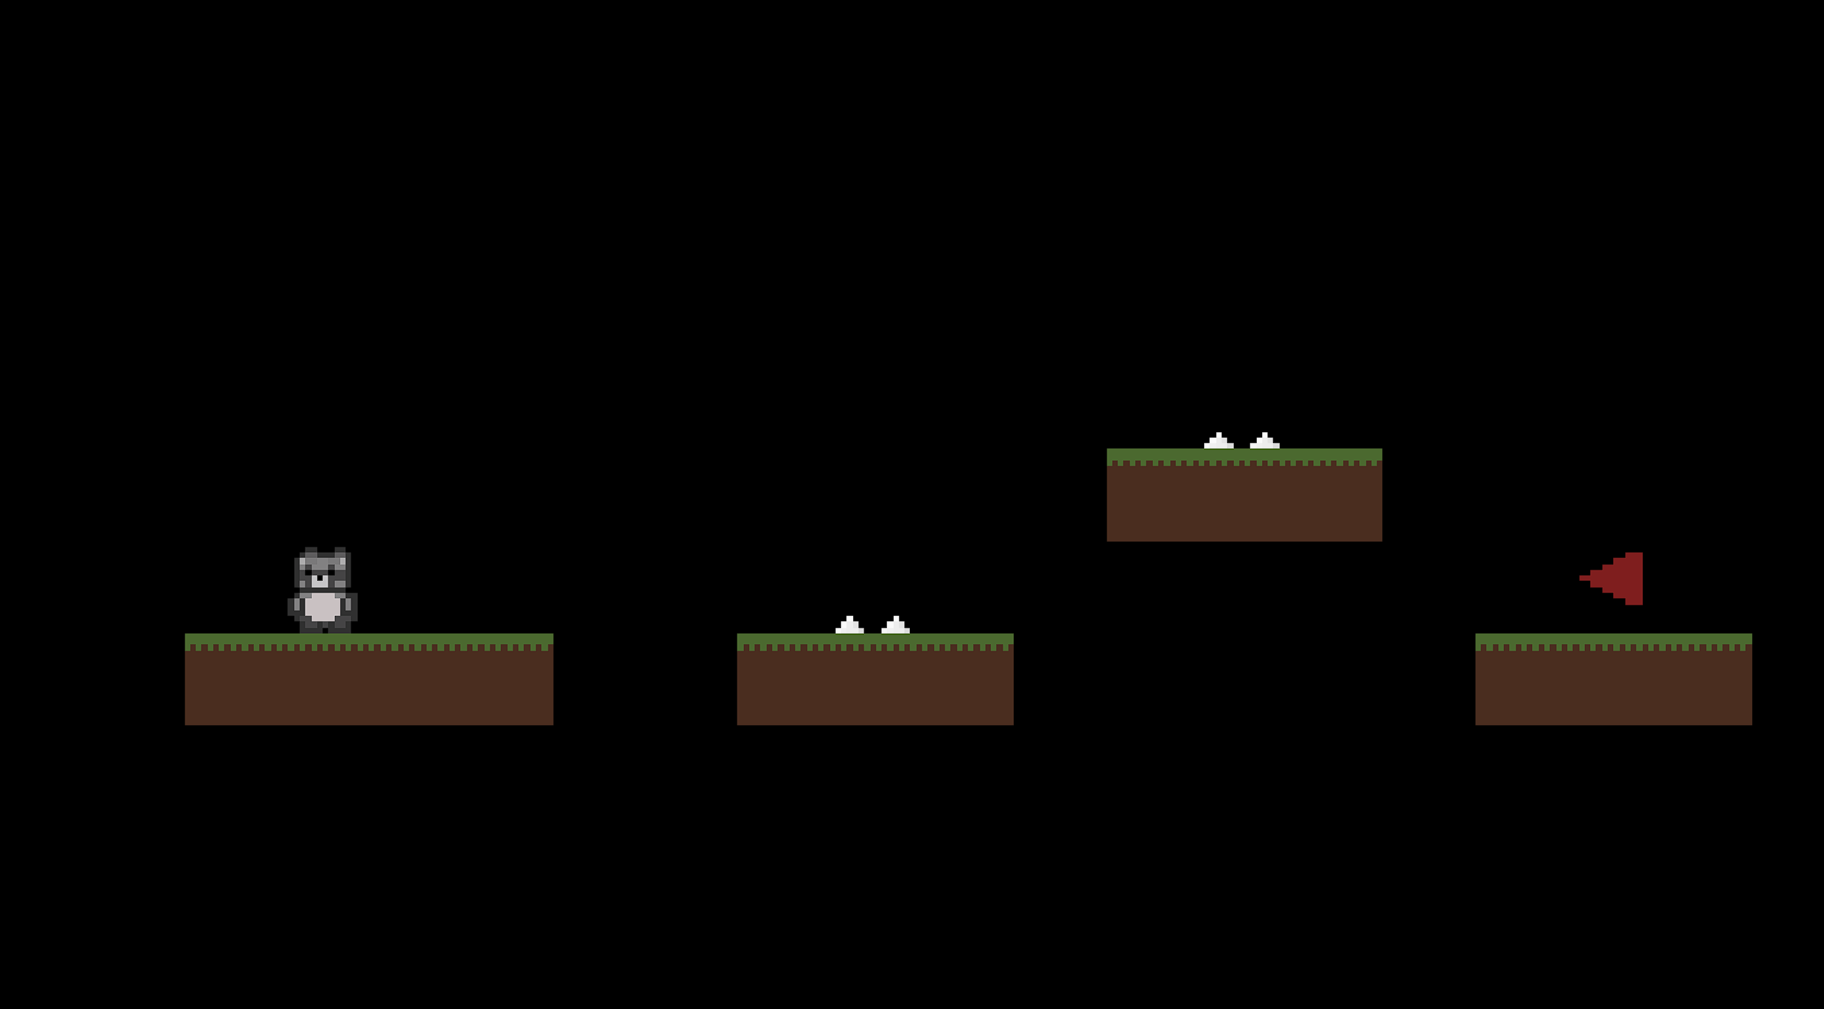
now, make a level! switch back to the Instances layer so you can add objects, and then you can drag in the objects from the asset browser into the room, or after selecting an object you can hold alt and click and drag to paint an object into the room. here’s what i made ->

testing the game
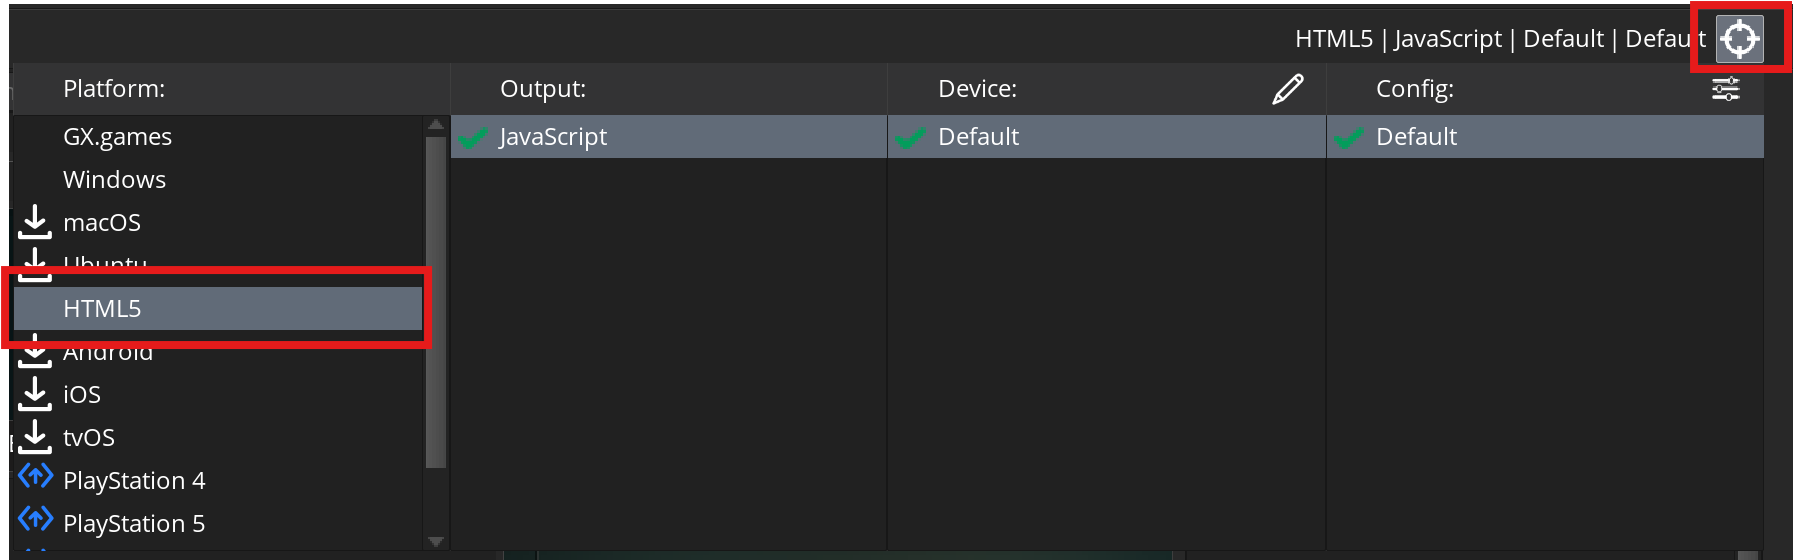
switch to an html5 build (web build) in the top right corner and hit play. it will prompt to sign in and download the HTML5 module, and you will have to switch to HTML5 again after signing in ->
yay! your game is (hopefully) working, but it doesnt do anything yet
lets fix that!

events
first open the oPlayer object (double click on it in the asset browser), click Add Event, and create a Create event and a Step event (just the normal Step event)
click GML Code if prompted

create event
next, add the following code to the Create event:
x_speed = 0;

y_speed = 0;

movement_speed = 1;

grav = 0.5; // don't call this gravity! that's a built-in gamemaker variable used for something else
this code creates four different variables which we will use for heidi's movement: horizontal speed, vertical speed, gravity, and movement_speed
the Create event only runs when an object is created, so x and y speeds start off at 0 since heidi is initially still
one more reminder to save your game! ctrl + s (windows) or cmd + s (mac)
step event
now, open the Step event.
the Step event runs every step (60 times per second), so any code here will be constantly running
first, lets make sure each step starts of with no horizontal motion and heidi has gravity in the y-direction:
x_speed = 0; // reset horizontal speed

y_speed += grav; // add gravity to y_speed
the comments (the text in green) are optional and don't impact the code, they are only there to keep things organized
next, add this code so that heidi can move left and right when the arrow keys are pressed:
if keyboard_check(vk_right) { // if the right arrow key is pressed

    x_speed = movement_speed; // set the horizontal speed to heidi's movement_speed

} else if keyboard_check(vk_left) { // otherwise, if the left arrow key is pressed

    x_speed = -movement_speed; // set the horizontal speed to negative heidi's movement_speed, making her move left

}
finally, add this code at the end of the Step event to update heidi's position based on her speed.
x += x_speed;

y += y_speed;
now, test out your code by hitting play!
solids
im sure you noticed that heidi fell straight through the floor, so lets fix that!
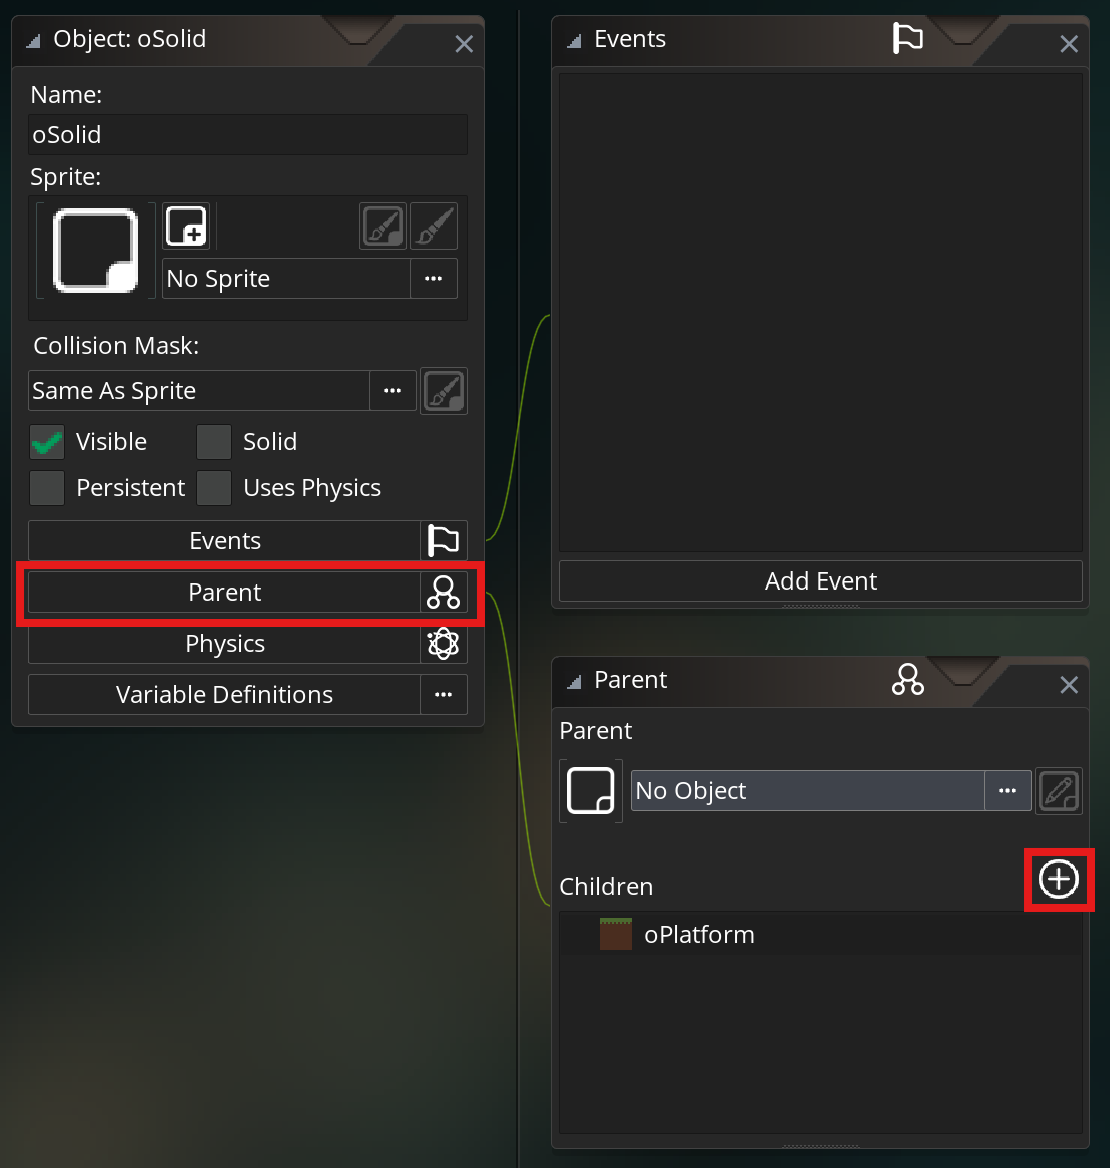
first create a new object called oSolid, this will function as a parent object for all of our solid objects that heidi can collide with
then, go to Parent and add oPlatform as a child object
collisions
now go back to the Step event in oPlayer and add this code to let her jump and collide with platforms:
if (place_meeting(x, y + 1, oSolid)) { // if heidi is on the ground

    if (keyboard_check_pressed(vk_up)) { // and the up arrow key is pressed

        y_speed = -10; // make heidi jump by setting her y_speed to a negative value

    } else { // otherwise, if heidi is on the ground but not jumping

        y_speed = 0; // set her y_speed to 0 so she doesn't fall through the ground

    }

}
next change this code:
x += x_speed;

y += y_speed;
to this:
move_and_collide(x_speed, y_speed, oSolid);
move_and_collide automatically handles collisions for us, so heidi won't fall through the ground anymore!
also, place_meeting checks if the current object (oPlayer) occupies the same space as another object (oSolid). we use y + 1 so we can check if heidi will collide with oSolid if she falls any further.
now, you can try out your game! the movement will still feel a little bit weird, so mess with the jump speed, gravity, and movement speed to get it feeling right!
polishing up
we're almost done, lets just finish up a few more things
first, we should make the spikes kill the player, add this code the the player Step event:
if (place_meeting(x, y, oSpikes)) { // if heidi collides with the spikes

    room_restart() // restart the level

}
let's also restart the level when the player goes out of bounds
if (y > room_height or y < 0 or x > room_width or x < 0) { // if the player is outside of the room

    room_restart();

}
also, lets make heidi face the direction she's going by adding these lines:
if keyboard_check(vk_right) {

    x_speed = movement_speed;

    image_xscale = -1; // flip heidi's sprite so she faces right

} else if keyboard_check(vk_left) {

    x_speed = -movement_speed;

    image_xscale = 1; // reset her sprite so she faces left

}
you'll realize that heidi flips directions really weirdly, this is because her center isn't properly configured.
go to the sprite sPlayer and change the center to Bottom Centre
source control
now, lets learn how to use source control!
source control is a way to keep track of any changes you make to your project, so you can revert back if you end up accidentally breaking something. more importantly, source control is how you'll collaborate with your friends at campfire!
first go to github.com and create an account. once you've done that, download github desktop and log in.
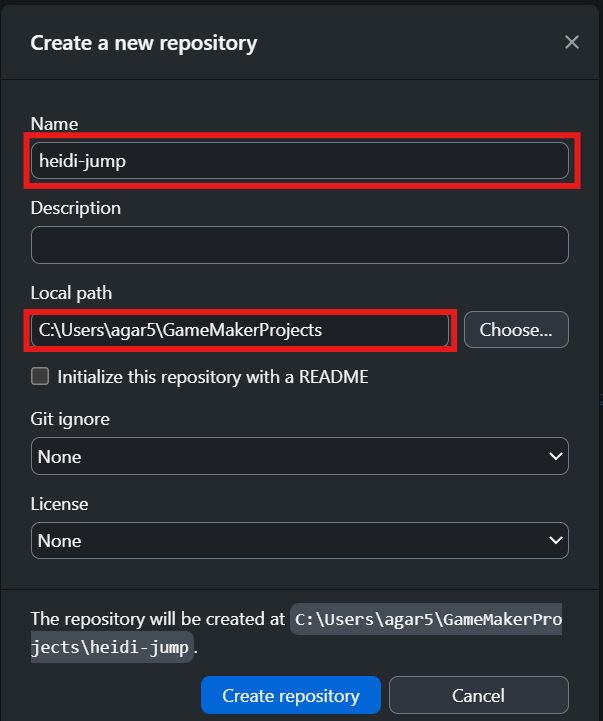
next, click Create a New Repository on your local drive and set the Local path the the location of your Gamemaker Projects folder.
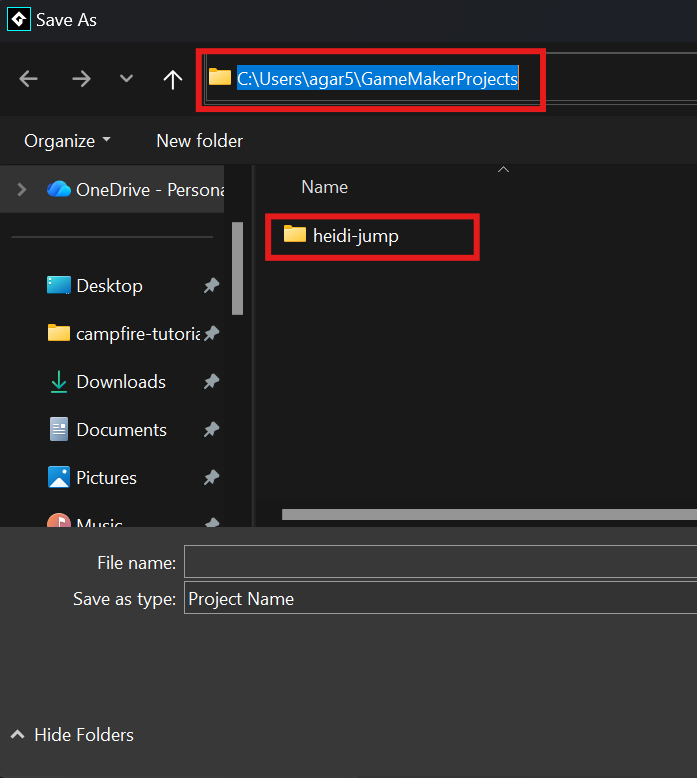
you can find the location of your Gamemaker Projects in the gamemaker editor by clicking File > Save As and copying the address bar of your file explorer
then, change the Name to the name of your game's folder and click Create Repository
see the images on the right for how it should look, make sure your games name doesn't have spaces in it!
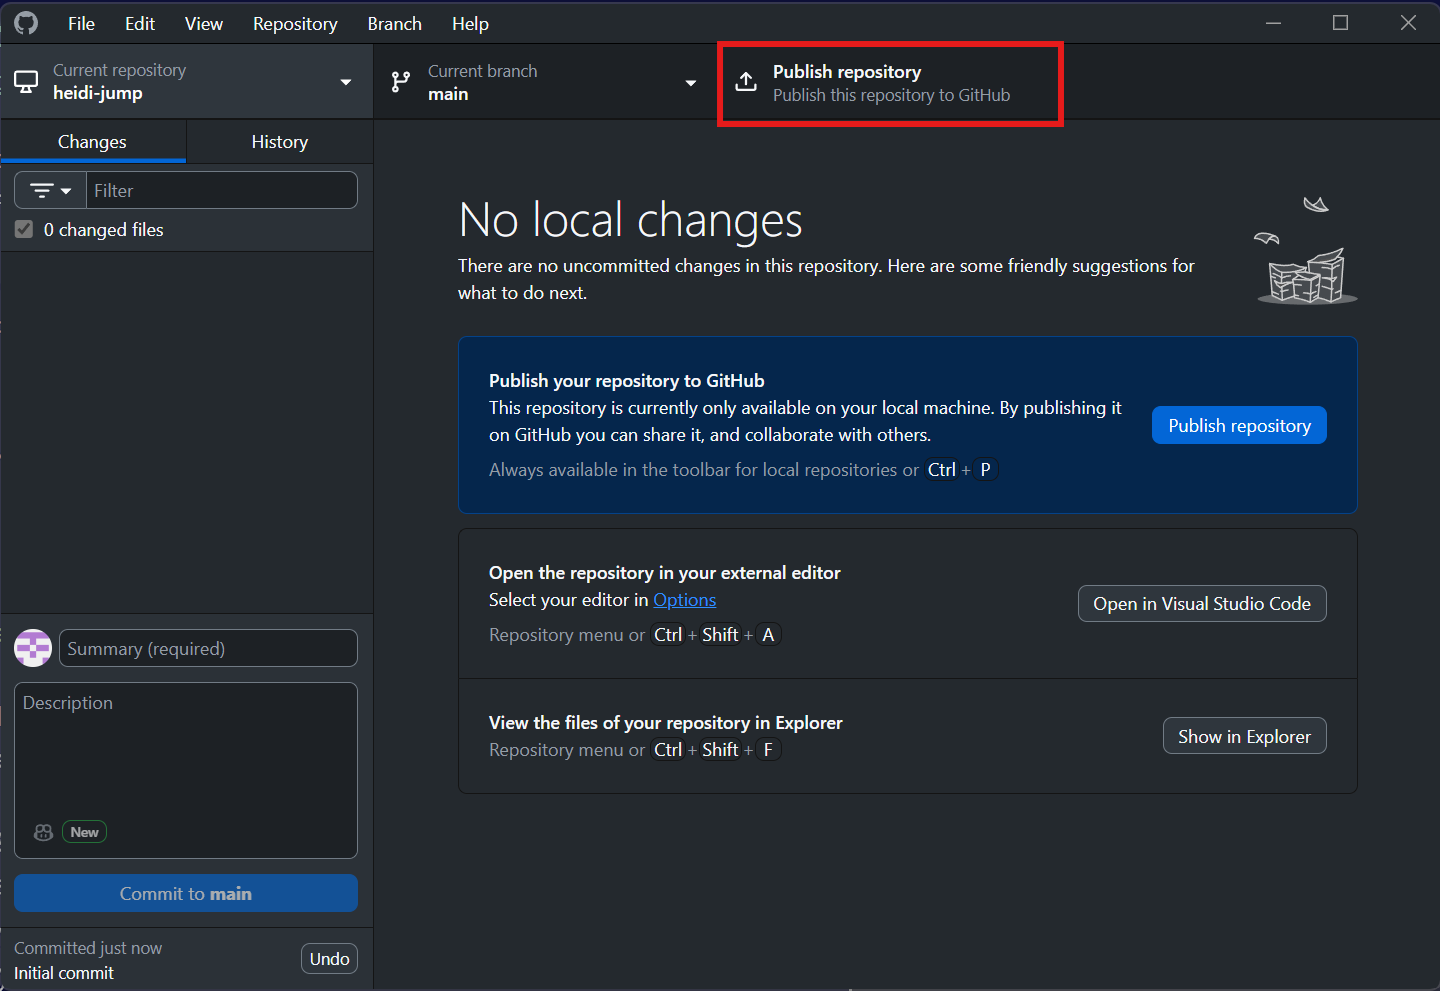
now, hit Publish repository and your all set! You can click View on GitHub to see repository's website
as you make changes to you project, (make sure you save your project regularly) you will see changes in github desktop, then you can commit them to main (essentially save your changes) and push it origin (upload your changes to github)

next steps
so now what happens when the player reaches the flag?
they could get a win screen, go to another level, or watch a super epic cutscene
there are so many possibilities! take some time and build on this game and make it your own.
remember there are tons of resources online and you can ask in #campfire-overdrive on slack for help
here are some ideas on what to do next:
- replace the art! the heidi jump is cool, but everyone who uses this guide makes it, so you should use your own or find some art (16x16 or something else) on itch.io
- make the level bigger, change the room size, make the camera follow the player, there's so many possibilities!
- make a way for the player to win, what kind of game doesn't have a win condition?
- add some cool mechanics, dashes, teleportation, npcs, its entirely up to you!
i didn't teach you how to do these things, but there are lots of guides and tutorials online to help you out, along with help in the slack channel!
once you're done, go the next slide to get some free stickers!
shipping
it's time to ship your game!
first, go to itch.io, create an account, and go to your dashboard
from here, click Create new project and customize your page! you add a directions, upload images, and many more.
once, you're done, go back to GameMaker and click Build in the top left corner, and click Create Executable > Package as Zip and save the zip file to anywhere you'd like
then, on itch.io, click Upload files and upload the zip folder you just created (if you can't find it, it's probably in you project folder, the same place where your github repository is)
next, change Kind of project on itch.io to HTML and under the folder you uploaded check This file will be played in the browser
change the Viewport Dimensions to the Viewport Properties of your viewport (bottom left corner of room editor).
you can now click Save and View Page to see your game's website
once you have everything working, click Draft at the top and change Visibility and access to Public and save.
now you're done, share your game with us here to get cool things!